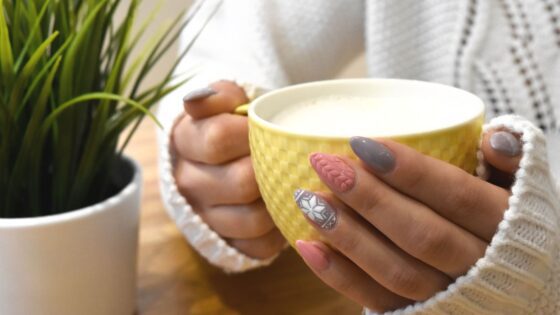
We love acrylics and have done our nails at some point or another using acrylics. They look fantastic and are a great way to enjoy stylish nails for longer. Just like the ones in this homemade chocolate popcorn post. We love showing off our nails in our food photography! You will notice that in every post we have a hand shot and making the nails look their best is very important to us! However, removing them takes some steps, especially if you are removing your acrylic nails at home.

Because, it’s common to get acrylics removed professionally, especially if you’re getting new nails reapplied on top. However, if you’re looking for advice on how to take acrylic nails off at home, the good news is you can learn how to do it yourself too in a few simple steps.
Love your acrylic nails but want to learn how to remove them safely yourself? We’ve put together great information on how to remove acrylic nails yourself quickly, easily, and most importantly without causing damage to your nails.

How to Remove Acrylic Nails with Acetone
One of the most common and easiest ways when it comes to how to remove acrylic nails is with acetone. Also known as propanone, acetone is a powerful liquid solvent that quickly and easily removes gel polish and adhesive.
Because of its powerful properties, acetone is used to break down the acrylic so it can be easily lifted off the nail but can be quite drying if used too heavily or frequently on natural nails.
Ready to get started? Here’s our step-by-step guide on how to remove acrylic nails at home:
The products you’ll need:
- Nail Clippers/Cuticle Nippers
- Nail File
- Acetone
- Cotton Wool/Lint Free Pads
- Tinfoil/Soak off Clips
- Cuticle Pusher
Step 1: Trim down your acrylic nails with nail clippers or strong cuticle nippers
This will reduce the surface area of the nail, allowing the acetone to penetrate the area of your natural nails more easily. Cut down to where your natural nails begin not too low though or you could damage your natural nail.
Step 2: Use a nail file to thin the acrylic
Run the nail file across the nail in a back and forth motion. The idea is to thin the acrylic, making it easier for the acetone to penetrate. Make sure not to file too deep, if you file too much, you run the risk of damaging your natural nail.
Step 3: Apply your acetone-soaked cotton wool to the nail
Soak cotton wool in acetone acrylic nail remover, then place directly over the nail ensuring it is fully covered. Then, using foil, wrap your nails in order to secure the cotton in place.
Step 4: Soak your nails
Leave the cotton wool and foil in place for at least 10 minutes to allow the acetone to soak into the acrylic.
Step 5: Remove your acrylic
Remove just one of the wraps, then gently use a cuticle pusher to scrape the softened acrylic off. The acrylic should lift and slide off easily if the acetone has penetrated enough. If the acrylic is still a little hard underneath, reapply the wrap and leave your nails to soak for a further five minutes before trying again.
You can repeat this process for each nail until the acrylic has been completely softened and removed, don’t be afraid to re-soak your cotton wool with acetone if it’s getting a little dry.
If you find that it is taking a while it could be the acetone you are using make sure you’re using 100% acetone and not a supermarket or drugstore acetone, as this is often watered down.
As tempting as it can be, never pull, cut or bite the acrylic of your nail! While this method may be faster, you’re very likely to damage and weaken your natural nails in the process.
Now you know how to remove acrylic nails at home like a pro, you can ensure you never have to resort to picking or biting them off again and save your nails from serious damage.
To ensure your nails are strong and healthy at all times, follow this DIY acrylic nails: a step-by-step guide. You will love all the tips!
Share with us, have you ever done your acrylic nails or tempted to remove them at home?
Hope you enjoyed all these tips and keep your nails healthy and looking great even after acrylic.

Hi there! I’m Wanda – the creator and author at My Sweet Zepol a healthy food, travel, and lifestyle blog. Passionate about food photography, food styling, entertaining and advocate about creating memories around the kitchen table. With a mission to create easy-to-make meals for the busy family.
Thanks for the tips. This is going to save me some money since I can do it at home. I will share this info with my cousin too.
Great post! I appreciate the detailed insights on improving SEO for nail glue-related content. Your tips on incorporating keywords effectively are incredibly useful.
As a student, I’ve found Essaypro.app to be a game-changer for essay writing. The app is intuitive and allows you to easily connect with professional writers. Whether I need help with research, editing, or complete essay writing, the platform offers quick access to skilled experts. The seamless communication with writers and the ability to track progress ensures quality work on time. Plus, the app’s mobile convenience makes it ideal for busy students like me who need reliable academic assistance on the go.
Very useful tips. I will try this on my nails. Well, I am looking for eyelash extension shampoo for my eyelashes extensions. Last time the shampoo which I bought was very useless. Now I thought to get suggestions if someone used a high quality shampoo for eyelashes. Where I should buy?
Taking off acrylic nails at home is a struggle—either it takes forever, or my nails feel wrecked afterward. After dealing with that mess, I decided to invest in better nail care products and tried Il Makiage. Ordered a nail treatment, but the tracking info never updated. Had to reach il makiage customer service to figure out what happened. Took some time, but they got it sorted, and my package finally arrived. Now just hoping my nails recover from all the damage!
I didn’t have any expectations concerning that title, but the more I was astonished. The author did a great job. I spent a few minutes reading and checking the facts. Everything is very clear and understandable. I like posts that fill in your knowledge gaps. This one is of the sort.
Visit this https://www.mysweetzepol.com/tips-and-tools-for-gardening-with-kids/
I rarely win big, but one evening in Oxford, that changed. I came across Luckster Casino while looking for a new place to play. Tried a pirate slot game with this mini-map bonus round that actually made me laugh. I thought I’d just burn through my balance but I triggered a 5x multiplier and walked away with £110. Definitely made the evening more interesting.
I’ve been spinning on Betrolla Casino, and what I like most is how every session feels different. Some days I go for crash games like Spaceman, other days it’s slots like The Dog House. The key for me is pacing — starting small, building slowly, and then going for that one big bet when the timing feels right. It doesn’t always land, but when it does, the rush is incredible. That’s the fun of this UK casino, you’re always one spin away from a surprise.
I just discovered Betstorm, and wow, it’s honestly one of the most exciting UK casinos I’ve tried. The slots are vibrant and packed with cool features that keep me spinning for hours, while the table games like blackjack and roulette add a perfect mix of strategy and thrill. I love that I can play straight from my phone, and every time I log in, there’s a fresh game or promo waiting to keep things interesting.
Halloween party food ideas for kids can be both fun and nutritious . Creative food presentation gets kids excited to eat and explore new flavors.
After the party, you can keep the fun and learning going by involving kids in food-related activities: counting ingredients, discussing colours, measuring spoons, or drawing their favourite spooky foods. For more ways to weave learning into play, try free kindergarten worksheets https://wunderkiddy.com/
— they have lots of engaging sheets that support early skills while keeping things light and fun.
Fresh poppy pods are the seed pods that are harvested from the poppy flower. Poppies are known for their beautiful flowers, but it’s their seed pods that are of the most value. These pods contain the seeds for the next crop and, when dried, they are frequently used in floral arrangements and other decorative crafts. By using fresh poppy pods, you can take your art to the next level as it gives a natural and pleasant look to your creations.
Green Flame Fuel: wood pellets is a comprehensive information resource promoting the UK as a global supplier of quality, environmentally-responsible forest products from sustainably-managed forests.
ELANGTANGKAS
ELANGTANGKAS says This is a very helpful resource. I appreciate the effort you put into this.
How to remove acrylic nails at home requires patience, care, and the right steps to avoid damaging natural nails. Acrylic nails look beautiful and last longer, but safe removal usually involves trimming, filing the top layer, soaking with acetone, and gently removing softened product without force. Proper aftercare, cuticle oil, and hydration are also important, a topic that can be shared on platforms like https://blindlucks.fr/.